
This page is designed for new detectorists who are excited to get out and hunt, but aren’t yet sure how to get the most from their Garrett detector. Inside, you’ll find a step-by-step beginner checklist, a practical gear guide, tips on “reading” trash patterns to zero in on hot spots, and a detector-specific playbook that shows you how to set up and run your machine with confidence. By following the 30-day skill-building plan and using the interactive checklists as you go, you’ll quickly move from random digging to making informed, efficient decisions in the field—so more of your time turns into real finds, not frustration.


Get the Most Out of Every Hunt
This page is your all-in-one guide to turning casual swings into real finds. From the first battery check to reading trash patterns like a pro, here’s everything you need to know to get the most out of your time in the field.
Beginner Metal Detecting Checklist
Use this checklist before, during, and after each hunt to build good habits and protect your finds.
Must-Have Metal Detecting Gear
You don’t need a truckload of equipment to find great targets. Start with the essentials, then layer in tools that make you faster and more accurate.
Essentials (Day-One Kit)
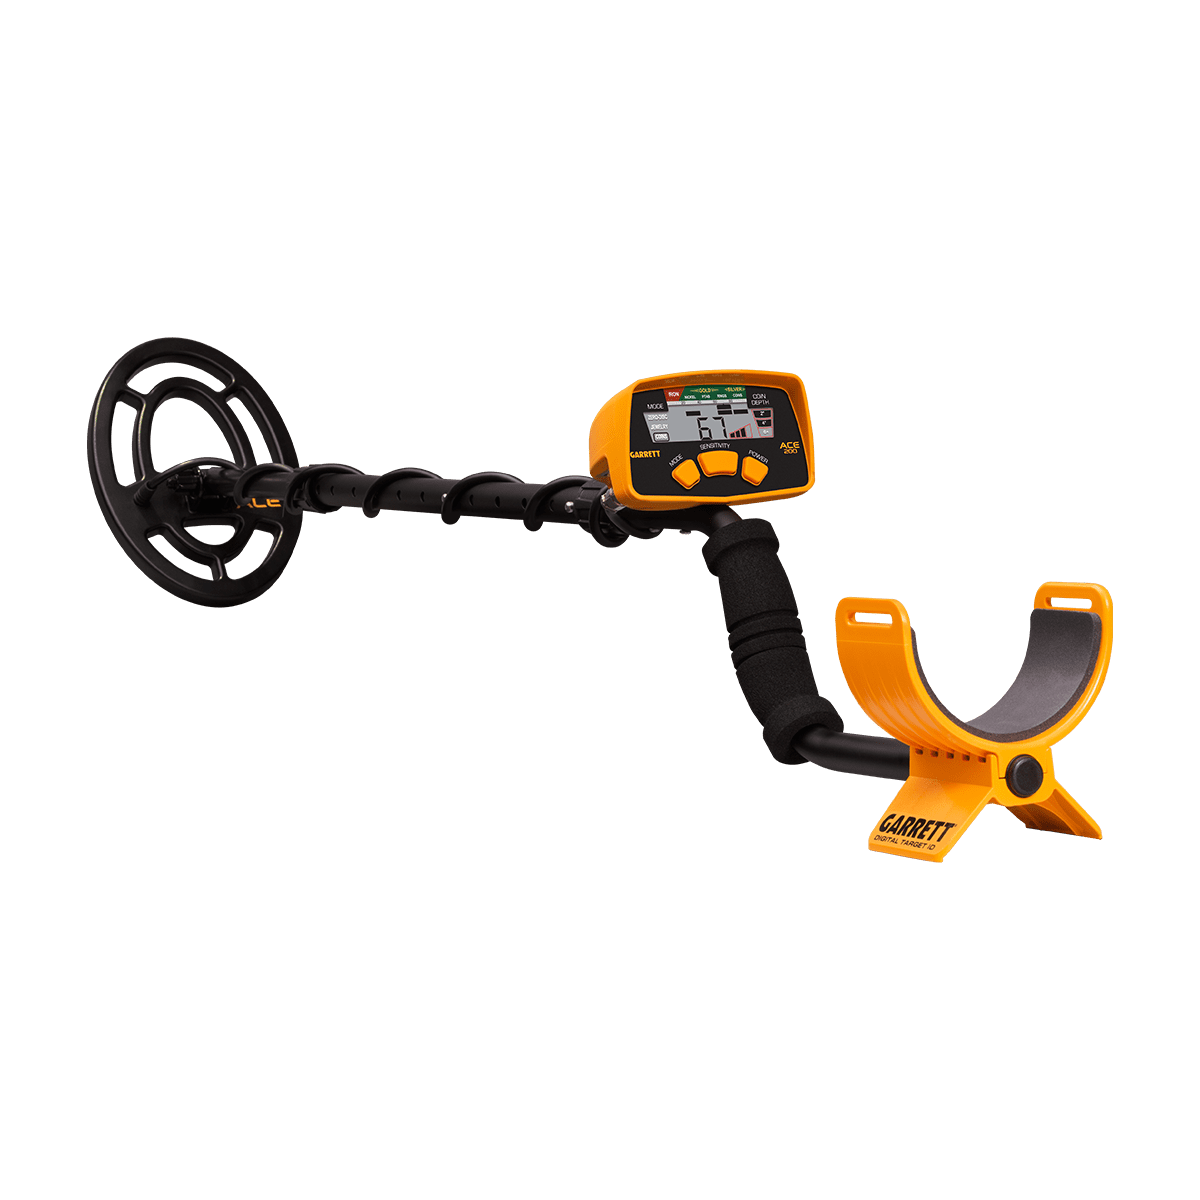
- Detector: Your ACE 200 is a great starter unit — light, simple, and reliable.
- Headphones: Help you hear faint targets and hunt quietly in public spaces.
- Hand digger & pouch: Speeds up recovery and keeps coins and jewelry separate from trash.
- Gloves: Protect you from glass, nails, and sharp metal in the ground.
Highly Recommended (Big Quality-of-Life Upgrades)
- Garrett Pro-Pointer AT: A pinpointer dramatically reduces recovery time and helps you zero in on targets in the plug or hole.
- Knee protection: You’ll be bending and kneeling a lot — protect your knees so long hunts stay fun.
- Sand scoop: Essential for beaches and volleyball courts; sift sand fast and keep the line moving.
- Coil cover: Protects your coil from wear and tear as you sweep over rocks and roots.
Nice-to-Haves (For the Dedicated Hunter)
- Trash bag: Good for the hobby, good for your reputation with property owners.
- Spray & brush: Clean dirt off coins and jewelry in the field without scratching them.
- Storage: Keep better finds safe and labeled so you remember where they came from.
- Notebook / app: Track locations, trash patterns, and your best-producing sites.
Reading Trash Patterns to Find Good Targets
The junk you dig is a map of where people stood, sat, and dropped things. Learn to read that map and you’ll know where jewelry, coins, and relics are hiding.
Pull tabs are annoying, but they’re also great news. They tell you people were drinking and hanging out — exactly where rings and jewelry get lost.
- Focus near picnic tables, shade trees, and bleachers.
- Don’t give up on mid-tones; gold often reads right with pull tabs.
- Work slowly in a grid — there’s usually at least one good target mixed in.
Foil usually means kids, snacks, and blankets on the ground. That’s prime territory for small jewelry drops.
- Check around swings, slides, and the edges of play areas.
- Look where people spread out blankets or chairs.
- Expect tiny charms, kids’ rings, earrings, and modern coins.
A scattered field of old iron often means there was once a house, barn, or structure on the spot — which is where old coins and relics live.
- Slow your swing and listen for stable, higher-tone signals among the iron.
- Circle around any promising area and work it from multiple angles.
- Mark the spot mentally or on a map — these places are worth revisiting.
Bottle caps are a classic sign of crowds — ball games, concerts, or long-used hangouts. Jewelry and coins follow people.
- Work the edges of fields, near concession stands, and around seating.
- Dig the clean, repeatable tones and note where trash density peaks.
- Use your trash bag and leave high-visibility areas cleaner than you found them.
When the trash disappears, often the people did too. You may be outside the main traffic pattern.
- Pay attention to boundaries: tree lines, sidewalks, fences, and parking lots.
- Hunt the transitions where people enter and leave — that’s where things get dropped.
- If the ground is silent and finds disappear, it’s time to adjust your path or site.
Garrett ACE 200: Hunt Playbook
The ACE 200 is at its best when you understand how its modes, tones, and sensitivity work together. Use this playbook to squeeze the most out of every swing.
Recommended Modes
Coins – Focus on higher-value targets
Jewelry – More mid-tones for rings and gold
Zero Disc – Hear everything, learn the site
- Coins Mode: Use in parks and schoolyards when you want to simplify what you’re hearing.
- Jewelry Mode: Great around picnic tables, beaches, and bleachers where rings get lost.
- Zero Disc: Use when scouting new ground or hunting old homes and relic sites.
Sensitivity & Coil Control
- Trashy areas: Run sensitivity at about 2–3 bars for stability.
- Clean fields or beaches: Bump up to 4 bars for extra depth.
- Coil: Keep it just off the ground, low and level, with smooth overlapping swings.
Small changes in swing speed and coil height can mean the difference between missing and hitting a good target.
Understanding Your Tones
- Low tones (0–39): Mostly iron and deep junk — listen, but don’t live here.
- Mid tones (40–75): Gold rings, nickels, tabs, foil. This is where a lot of jewelry hides.
- High tones (75+): Copper and silver coins, some rings, and higher-conductive targets.
Pro tip: Gold often sounds like trash. If you never dig mid-tones, you’ll almost never find gold.
Signal Quality Checklist
- Can you get the signal from more than one direction?
- Is the tone fairly consistent, or does it jump wildly?
- Does the depth reading make sense for the site?
If the answer is “yes” to those questions, it’s usually worth digging — especially in older ground.
30-Day Skill-Building Plan
Follow this simple month-long plan with your ACE 200 to build confidence, learn your tones, and start stacking real finds instead of just random digs.
Week 1 – Learn the Language
- Hunt 2–3 times in playgrounds or clean parks.
- Spend at least one hunt in Zero Disc to hear everything.
- Dig almost every solid signal to learn how targets sound.
- Practice pinpointing and cutting neat plugs.
Week 2 – Smart Target Choices
- Switch to Coins or Jewelry mode in busier parks.
- Focus on signals you can repeat from multiple directions.
- Consider skipping obviously broken, jumpy signals.
- Log what you’re finding at different tone ranges.
Week 3 – Research & Old Ground
- Use old maps and local history to find older parks or yards.
- Ask permission for at least one older property.
- Use Zero Disc to scout iron patterns and locate old activity zones.
- Work slowly around big shade trees, walkways, and porches.
Week 4 – Patterns & Refinement
- Revisit your best-producing site and hunt it in a grid.
- Study your trash — where did tabs, foil, and caps cluster?
- Push yourself to dig a mix of high and mid tones.
- Adjust your style based on what’s actually working.
By the end of 30 days, you’ll know how your ACE 200 “talks” and how different sites behave — and that’s when the hobby really gets fun.

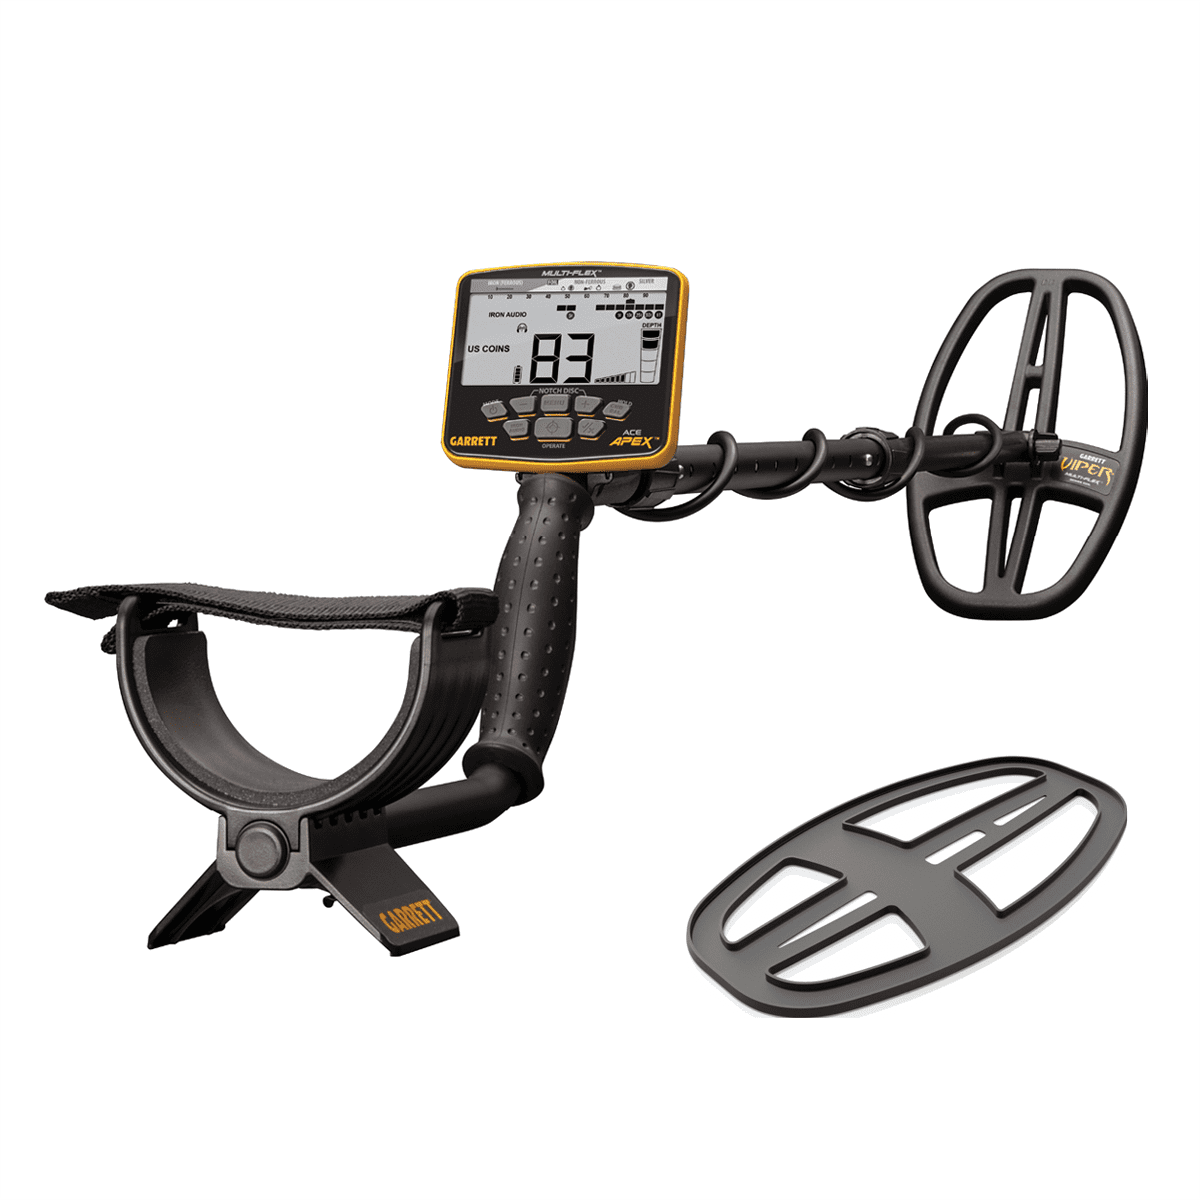

Garrett ACE Apex
Multi-Frequency
The pinnacle of multi-frequency detection flexibility. Includes 6" x 11" DD Viper searchcoil and built-in Z-Lynk wireless technology.
Get the Most Out of Every Hunt
This guide helps you turn the Apex’s Multi-Flex power into real finds. From charging and updating to choosing the right mode and frequency, here’s everything you need to know to get the most out of every swing.
Beginner ACE Apex Checklist
Use this checklist before, during, and after each hunt to build good habits and protect your finds.
Must-Have Gear for the ACE Apex
The Apex doesn’t need a truckload of accessories to shine. Start with the essentials, then add tools that make you faster and more accurate on every hunt.
Essentials (Day-One Kit)
- Detector: Multi-Flex and a fast response make the Apex strong in parks, fields, and on the beach.
- Headphones: Better separation of tones and easier hunting in noisy environments.
- Hand digger & pouch: Keep good finds separate from trash and speed up recovery.
- Gloves & towel: Protect your hands and clean the detector after muddy or salty hunts.
Highly Recommended (Quality-of-Life Upgrades)
- Garrett Pro-Pointer AT: Cuts recovery time dramatically and helps in tight holes or water edges.
- Knee protection: Makes long park and field hunts much easier on your body.
- Sand scoop: Essential for salt and freshwater beaches; dig, shake, and keep moving.
- Rain / control cover: Protects the Apex screen and controls from weather and grime.
Nice-to-Haves (For the Dedicated Apex Hunter)
- Trash bag: Builds goodwill with landowners and park staff.
- Spray & brush: Clean dirt off coins and jewelry in the field without scratching them.
- Storage: Keep better finds safe and labeled so you remember where they came from.
- Notebook / app: Track settings, sites, and best finds so you can repeat what works.
Reading Trash Patterns to Find Good Targets
The junk you dig is a map of where people stood, sat, swam, and dropped things. Learn to read that map and you’ll know where jewelry, coins, and relics are hiding — on turf or in the shallows.
Pull tabs are annoying, but they’re also good news. They show you where people were hanging out — exactly where rings and jewelry get lost.
- Focus near picnic tables, shade trees, bleachers, and fire pits.
- Don’t abandon mid-tones; many gold rings read right with tabs.
- Use Iron Audio to help call out bottle caps hiding in this range.
Foil usually means kids, snacks, and blankets on the ground. That’s prime territory for small jewelry drops.
- Check around swings, slides, and the edges of play areas.
- Hunt where people spread blankets or chairs, especially under shade.
- Expect tiny charms, kids’ rings, earrings, and modern coins.
A scattered field of old iron often means there was once a house, barn, or structure on the spot — which is where old coins and relics live.
- Use Zero or Relics and listen for consistent non-ferrous tones mixed in with the iron.
- Turn on Iron Audio when you’re unsure if a high tone is being “pulled” by iron.
- Flag promising patches; they’re worth multiple return trips with different angles and settings.
Bottle caps often mark sidelines, concerts, and long-used hangouts. Jewelry and coins follow the crowds.
- Work the edges of fields, near concession stands, and around seating.
- Use Iron Audio to help separate good highs from trashy caps.
- Bag that trash — clean sites are more likely to stay open to detectorists.
When the trash disappears, often the people did too. You may be outside the main traffic pattern.
- Watch boundaries: tree lines, sidewalks, fences, docks, and parking lots.
- Hunt the paths people use to enter and exit — that’s where things get dropped.
- If the ground is dead quiet, adjust your path or move back toward the busy zones.
Garrett ACE Apex: Hunt Playbook
The Apex really shines when you match its modes and frequencies to the site. Use this playbook to get confident with Multi-Flex on land and at the beach.
Recommended Modes
Coins – Parks, schoolyards, modern drops
Jewelry – Picnic spots, sidelines, beaches
Relics – Old home sites and iron-rich ground
Zero – Hear everything, scout new sites
- Coins: Great when you want to focus on modern coinage and keep the audio calmer.
- Jewelry: Opens up more mid-conductors — perfect where rings and bracelets get lost.
- Relics: Keeps more mid-conductive targets while still giving helpful iron info.
- Zero: Best for scouting new sites or working historic ground where you don’t want to miss anything.
Multi-Flex & Sensitivity
- Multi: Solid “do-it-all” choice for most inland parks, fields, and yards.
- Multi-Salt: Designed for wet salt sand and surf edges — use it when your standard settings chatter on the beach.
- Single 5 kHz: Good for larger, high-conductive targets and deep coins.
- Single 10–15 kHz: Good all-around choices for mixed hunting.
- Single 20 kHz: Better for smaller, low-conductive targets in mild ground.
- Trashy areas: Try sensitivity at about 3–4 bars for stability.
- Clean fields / beaches: Bump to 4–6 bars if the machine runs quiet.
If the Apex gets chatty, drop sensitivity a bar or two, re-ground balance, or change frequency — a calm machine helps you hear the real targets.
Understanding Apex Tones
- Low tone: Most iron and many deep junk targets.
- Mid tone: Nickels, many gold rings, pull tabs, and some foil.
- High tone: Copper and silver coins, many higher-conductive jewelry items.
Pro tip: Use Iron Audio on suspicious high tones — if the iron grunts “bleed through,” it may be a bottle cap or junk near a good target.
Signal Quality Checklist
- Can you repeat the signal from at least two directions?
- Does the ID stay reasonably tight, or is it jumping all over the scale?
- Does the depth reading make sense for the target and soil type?
- What does Iron Audio reveal when you sweep back over the signal?
If you can answer “yes” to most of these — especially in older or researched ground — it’s usually worth digging.
30-Day ACE Apex Skill-Building Plan
Follow this month-long plan to learn how the Apex “talks,” when to use Multi vs. Multi-Salt, and how to tune it fast for each new site.
Week 1 – Learn the Basics
- Hunt 2–3 times in clean parks or playgrounds using Coins mode and Multi.
- Dig most repeatable signals to learn how tones and IDs line up with real targets.
- Practice pinpointing and cutting neat plugs in turf.
- Note which ID ranges are giving you coins vs. trash.
Week 2 – Modes, Iron Audio & Mid Tones
- Switch between Coins and Jewelry in the same park to hear the difference.
- Spend one full hunt digging mid tones and logging what you find.
- Use Iron Audio regularly to learn how caps and junk “sound” under good tones.
- Experiment with one or two bars less sensitivity in trashy zones.
Week 3 – Research & Old Ground
- Use old maps or local history to find an older park, yard, or permission.
- Scout in Zero or Relics, then settle into the mode that sounds best.
- Work slowly around big shade trees, walkways, and former building sites.
- Log where iron and old trash cluster — those spots often pay off over multiple visits.
Week 4 – Beach & Refinement
- If you have access to a beach, spend a session using Multi-Salt on the wet sand and surf edge.
- Revisit your best inland site and grid it from a new direction with slightly different settings.
- Review your notes: which modes, frequencies, and sites produced the best finds?
- Build a “go-to” set of Apex settings you can dial in quickly when you arrive at a new site.
By the end of 30 days, you’ll know which Apex settings feel natural, how to adapt them quickly, and where your best sites really are — that’s when the hobby starts to snowball.


Garrett Vortex VX5
Perfect powerful entry level detector
Loaded with features and provides fast, fixed recovery speed on adjacent targets. Submersible to 16 feet (5 meters). Single and multi-frequency options.
Get the Most Out of Every Hunt
This guide is your starting point for turning the VX5’s Multi-Frequency power into real finds. From charging up to choosing the right mode, here’s everything you need to know to get the most out of every swing on land or in the water.
Beginner Vortex VX5 Checklist
Use this checklist before, during, and after each hunt to build good habits and protect your finds.
Must-Have Gear for the Vortex VX5
You don’t need a truckload of equipment to take advantage of the VX5. Start with the essentials, then layer in tools that make you faster and more accurate on every hunt.
Essentials (Day-One Kit)
- Detector: VX5 gives you Multi-Frequency and 13 kHz single frequency in one package — plenty of power for most sites.
- Headphones: Hear faint targets, separate tones clearly, and hunt politely in public places.
- Hand digger & pouch: Speeds up recovery and keeps good finds separate from trash.
- Gloves & towel: Protect your hands and wipe down the detector after water or mud hunts.
Highly Recommended (Quality-of-Life Upgrades)
- Garrett Pro-Pointer AT: Locks onto the target in the plug or hole so you spend less time digging and more time hunting.
- Knee protection: Makes long hunts and water-edge hunting much more comfortable.
- Sand scoop: Essential for beaches and shallow water; scoop, shake, and move on.
- Spare hardware: Extra coil bolt and washers in your bag prevent a hunt from ending early.
Nice-to-Haves (For the Dedicated VX5 Hunter)
- Trash bag: Builds goodwill with landowners and park staff.
- Spray & brush: Clean dirt off coins and jewelry in the field without scratching them.
- Storage: Keep better finds safe and labeled so you remember where they came from.
- Notebook / app: Track sites, settings, and best finds so you can duplicate success.
Reading Trash Patterns to Find Good Targets
The junk you dig is a map of where people stood, sat, swam, and dropped things. Learn to read that map and you’ll know where jewelry, coins, and relics are hiding — whether you’re on turf or in the shallows.
Pull tabs are annoying, but they’re also great news. They tell you people were drinking and hanging out — exactly where rings and jewelry get lost.
- Focus near picnic tables, shade trees, bleachers, and fire pits.
- Don’t walk away from mid-tones; many gold rings live in this range.
- Work slowly in a grid — there’s usually at least one keeper mixed into the junk.
Foil usually means kids, snacks, and blankets on the ground. That’s prime territory for small jewelry drops.
- Check around swings, slides, and the edges of play areas.
- Hunt where people spread out blankets or chairs, especially under shade.
- Expect tiny charms, kids’ rings, earrings, and modern coins.
A scattered field of old iron often means there was once a house, barn, or structure on the spot — which is where old coins and relics live.
- Slow your swing and listen for consistent higher tones mixed in with the iron.
- Use Zero mode to scout, then switch to Standard or a tighter Custom pattern once you find the hot zone.
- Mark promising patches; they’re worth multiple return trips with different angles and settings.
Bottle caps often mark game sidelines, concert spots, and long-used hangouts. Jewelry and coins follow the crowds.
- Work the edges of fields, near concession stands, and around seating.
- Use Iron Audio to help decide whether suspicious caps are worth digging.
- Bag that trash — clean sites are more likely to stay open to detectorists.
When the trash disappears, often the people did too. You may be outside the main traffic pattern.
- Watch boundaries: tree lines, sidewalks, fences, docks, and parking lots.
- Hunt the paths people use to enter and exit — that’s where things get dropped.
- If the ground is dead quiet, adjust your path or move back toward the trashy areas.
Garrett Vortex VX5: Hunt Playbook
The VX5 is at its best when you understand how its modes, tones, and frequency choices work together. Use this playbook to squeeze the most out of every hunt.
Recommended Modes
Standard – Everyday relics, jewelry, and mixed coins
US Coins – Parks, schools, and coin-focused hunts
Zero – Hear everything, scout new sites
Custom – Your own notched pattern
- Standard Mode: Great “default” mode for most sites and mixed targets.
- US Coins: Ideal when you’re mainly chasing modern coins and want a quieter hunt.
- Zero: Use when checking new ground or hunting older sites where you don’t want to miss anything.
- Custom: Build this slowly over time based on what you prefer to hear (and not hear).
Frequency & Sensitivity
- Multi-Frequency (Multi): Best “set it and forget it” choice for most parks, fields, and freshwater edges.
- 13 kHz single frequency: Simple and effective when EMI is low and ground is mild.
- Trashy areas: Run sensitivity around 3–4 bars for stability.
- Clean ground / open fields: Try 4–6 bars if the machine runs quiet.
- Frequency Shift: If you hear chatter from power lines or other detectors, shift frequencies to calm the machine.
Small changes in sensitivity and frequency can turn a noisy site into a smooth, confidence-building hunt.
Understanding VX5 Tones
- Low tone: Most iron and many deep junk targets.
- Mid tone: Nickels, many gold rings, pull tabs, and some foil.
- High tone: Copper and silver coins, some higher-conductive jewelry.
Pro tip: If you never dig mid tones, you’ll almost never see gold or nickels.
Signal Quality Checklist
- Can you get the signal from at least two directions?
- Is the tone fairly consistent, or does it jump all over the ID scale?
- Does the depth reading make sense for the target type and site?
- Does Iron Audio hint at bottle caps or junk hiding under a “good” tone?
If you can answer “yes” to most of these, it’s usually worth digging — especially in older or researched ground.
30-Day VX5 Skill-Building Plan
Follow this month-long plan with your VX5 to learn its language, experiment with Multi vs. 13 kHz, and start stacking real finds instead of just random digs.
Week 1 – Learn the Basics
- Hunt 2–3 times in clean parks or playgrounds using Standard mode and Multi frequency.
- Dig almost every repeatable signal to learn how targets sound and ID.
- Practice pinpointing and cutting neat plugs in turf.
- Note which tone/ID ranges produced the best targets.
Week 2 – Modes & Mid Tones
- Switch between Standard and US Coins in the same park and compare what you hear.
- Focus on mid tones and log how often they’re junk vs. good targets.
- Experiment with one or two bars less sensitivity in trashy zones.
- Try 13 kHz for at least one hunt and compare behavior to Multi.
Week 3 – Research & Old Ground
- Use old maps or local history to find an older park, yard, or permission.
- Start in Zero mode to “hear it all,” then drop into Standard or a starter Custom pattern.
- Work slowly around big shade trees, walkways, and former building sites.
- Log where you’re finding iron clusters; they often mark former structures.
Week 4 – Water & Refinement
- If conditions allow, take the VX5 to shallow freshwater or damp sand and practice coil control at the edge of the water.
- Hunt your best-producing land site in a tight grid, changing angles and sensitivity.
- Review your notes: which modes, frequencies, and sites gave the best results?
- Build or refine a Custom pattern that matches your hunting style.
By the end of 30 days, you’ll know how your Vortex VX5 “talks,” which sites match it best, and how to tune it quickly — so every new permission or park feels like an opportunity, not a mystery.